How can I modify MX records?
How to I modify MX records
- Log in to the cPanel.
- Scroll down to the "Domains" section of cPanel then click on "Zone Editor".

- Select the domain on which you must modify the MX records then click on "Manage".

- Filter the records to display only MX records by clicking on the filter option labeled "MX".

- Find the record you want to edit and click Edit to make the necessary changes.
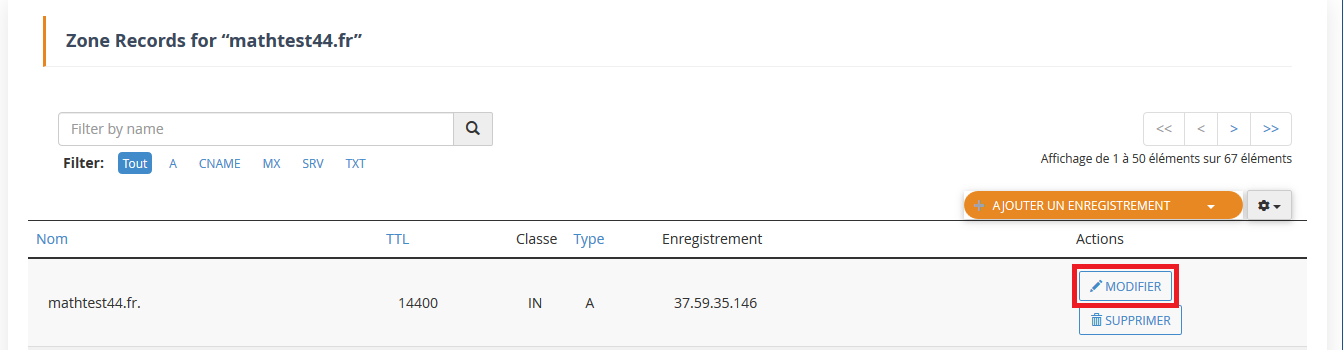
- Click the "Save recording" button to save your changes.

- Any changes you made to the MX record will be saved.
What is the default server name for ex2 services?
The default server names for Ex2 services differ from server to server. Please contact our support team for the server names for your domain.
I accidentally deleted a DNS zone, how do I restore it?
Please note that the DNS delete and restore option is only available for a dedicated server. You can follow the steps below if you are using a dedicated server:
- If your cPanel is configured for daily backups and you accidentally deleted a DNS zone or need to restore one for a client, all of your DNS zone backup files are stored here:
« /backup/cpbackup/daily/dirs/_var_named ».
- You can now either copy the file you need or copy the entire folder if you need to restore all DNS zones.
These files should be moved to /var/named
- Once you've moved the backup copy to /var/named, you need to change the ownership of these files to named.named, for that we'll use chown.
« chown -R named:named /var/named »
Ultimately, this changes the permissions for the entire /var/named folder. There are a few files that must be owned by root, however. To do this use chown again, here are the files/folders that must belong to the root: named
« chown root.named /var/named/chroot/ »
« chown root.named /var/named/localdomain.zone »
« chown root.named /var/named/localhost.zone »
« chown root.named /var/named/named.broadcast »
« chown root.named /var/named/named.ca »
« chown root.named /var/named/named.ip6.local »
« chown root.named /var/named/named.local »
« chown root.named /var/named/named.rfc191»
Once all of your property settings are correct, we'll need to restart named. "Restarting server names"
After restarting named, we'll want to rebuild the DNS configuration in the cPanel, so run this command:
« /scripts/rebuilddnsconfig »
Check all your files uploaded to WHM and verify with a DNS script.
Updated on: 07/07/2026
Thank you!